We recommend using a piece of software called Handbrake for converting high resolution digital video files down to smaller files suitable for uploading to our server.
Tutorial for Using Handbrake
1) Download for free from the Handbrake project and install.
2) Gather your media files and launch Handbrake.
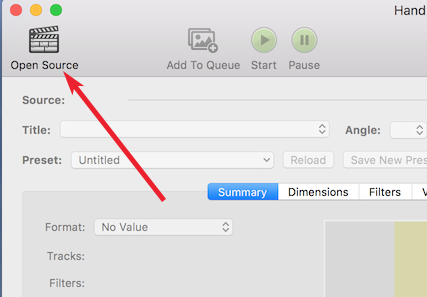
3) Hit the “Open Source” button in the top left of the application and load your large, original source file. In this example, I’m selecting a file called “large.mp4”
 |
|---|
| Load Original File |
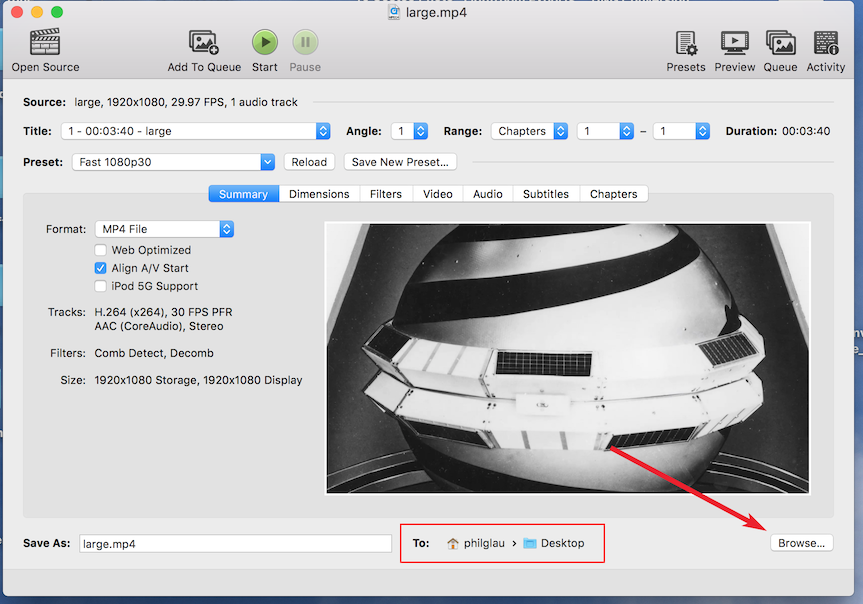
4) You can set your preferred Destination for the reduced file by using the Browse button. I have a folder on my Desktop called “Conversion” for holding all my renders. This setting is remembered once set.
 |
|---|
| Set Destination |
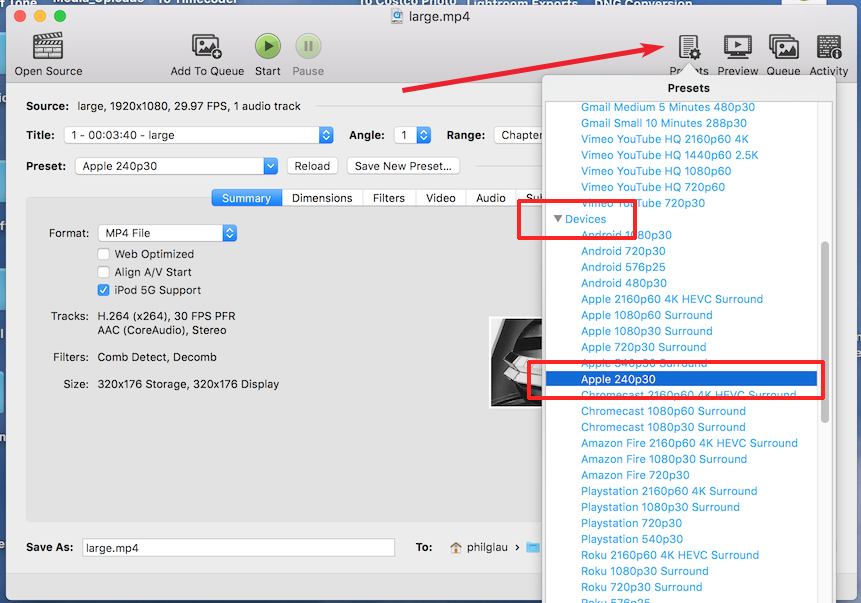
5) Now toggle the “Toggle Presets” button in the top right and select “Apple240p30” as the default upon which we’ll build a suitable setting. It is in the sub-menu called “Devices”
 |
|---|
| Toggle Presets Menu |
6) Now we’ll adjust some of the settings to reduce the file size. For transcription we don’t need absolutely perfect image, but we do want high quality audio.
NEXT STEPS ARE IMPORTANT
Select the “Video” tab.
Change the “Quality” setting from Constant Quality to “Average Bitrate”. For the Apple240p30 preset, 350kbit is fine. This is where the big reduction in file size comes from.
Deselect the ‘2-pass encoding’. This is not needed and would double the conversion time.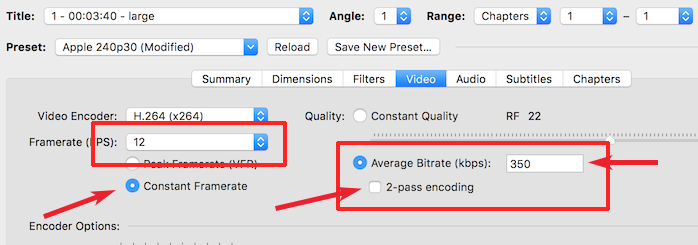 |
|---|
| Set Video Compression Rates |
Now change the frame rate to 1/2 of your original frame rate. As of 2020, most footage is 24fps, so enter 12. If you shot 30fps or 29.97fps, select 15.
Change from Peak Framerate to Constant Framerate.
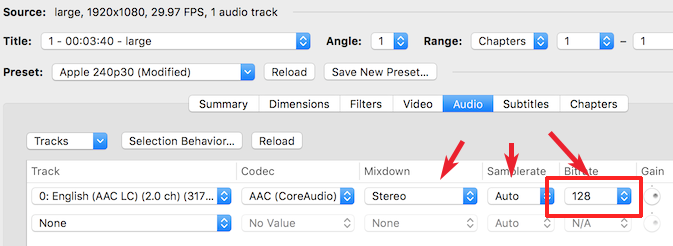
7) Select the “Audio” tab
This tutorial assumes you only have two channels of audio!!
Set the CODEC to AAC if not already set. Bitrate can be reduced to 128 from the default of 160.
 |
|---|
| Set Audio Compression Rates |
8) We’re ready to render. Hit the “Start” button near the top left. The application will let you know when it’s finished.
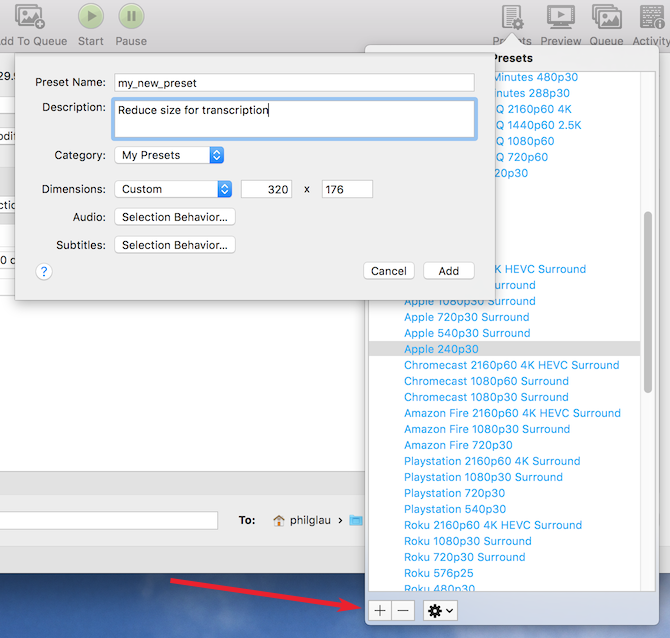
You can save a preset by selecting “+” on the Toggle Presets side menu near the bottom or the “Save New Preset..” button. Give it an appropriate name. In this example, I named it “my_new_preset”, but you can enter whatever you like. The new preset will appear in the “My Presets” section of the Presets menu for future use.
 |
|---|
| Save as a custom preset for future use. |
Adding Additional Files to the Render Queue.
While one file is rendering, you can add additional files with the same setting to the queue. ‘Browse’ for the 2nd file. It will populate. Double check that the settings haven’t changed. If everything looks good, click the “Add to Queue” button. You can now convert a batch of files.
Rendering Burnt In Timecode
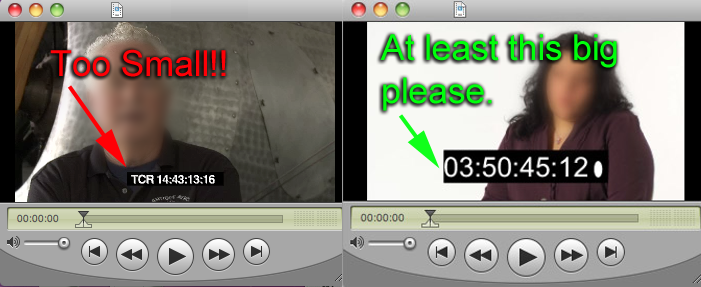
Because the file has now moved down from HD to a much smaller size, it is important to burn your timecode LARGE on the source clip, even though it will look ridiculously big on the HD file, it will look correct on the smaller transcription dub. Real live humans need to be able to easily read the timecode, so please render it at least as big as the image on the right below. Unfortunately Adobe Premiere and Final Cut default to a ‘too-small’ setting as the default.
 |
|---|
| Be sure to render timecode LARGE! |